Brushes: The Secret to Flawless Makeup

Take a peek into the kit of a professional makeup artist and you’ll see a dozen or more makeup brushes. What makeup artists know that the rest of us may not is that brushes are the secret to makeup that looks both polished and natural. They allow you to place foundation, concealer, shadow and blush with pinpoint precision. Brushes are also far better tools than fingertips for blending. Instead of lines of demarcation, stripes and edges, you can achieve seamless perfection. What’s more, brushes pick up far less product than your fingers do, which means your pricey compacts and tubes last a lot longer.

Ready to assemble a makeup brush kit? According to top makeup artists, these are the eight essential brushes every woman needs.

Foundation Brush
For liquid foundation, you have two choices. A traditional foundation brush is short and flat with stiff bristles for sheer, streak-free application. Another option is a short and round, flat-topped brush, sometimes called a “stippling brush” or -- because it has both natural and synthetic bristles -- a “duo” brush. Brett Freedman -- a celebrity makeup artist whose clients include Emily Blunt, Lisa Kudrow and Catherine Zeta-Jones -- is a fan of the duo brush. He first uses the brush to apply a light layer of moisturizer to the skin. “When I apply foundation with the same brush, there’s still a touch of moisturizer left, so you get a soft, dewy finish,” says Freedman.

Concealer Brush
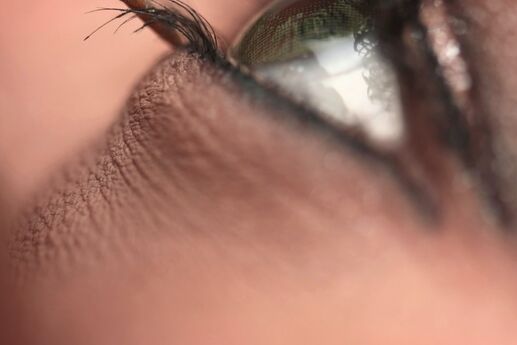
Flat with a slightly pointed tip, this brush lets you get right up against the lash line and the inner corners of the eyes, where dark shadows lurk. Plus, you can cover zits or red areas, without spreading product on the surrounding skin and drawing attention to the imperfection you’re trying to hide.

Powder/Blush Brush
Soft, full and round, this multipurpose brush can be used for blush, bronzer and translucent powder. Remember to tap the brush lightly against the edge of your counter or sink to remove excess product. If you find you’re still applying more pigment to your skin than you’d like, consider a kabuki brush. This squat, dome-shaped brush spreads powder over a wider area for a more natural look. It’s a favorite tool of Anastasia Soare, a Los Angeles brow guru and makeup artist whose A-list client roster includes Jennifer Lopez and Penelope Cruz.

All-over Eye Shadow Brush
Small and dense with a rounded tip, this soft brush is used to sweep powder shadow over the lid. Apply a single layer of sheer color, or build dramatic hues with several layers.

Crease Brush
A tapered dome-shaped top allows this brush to nestle right in the crease of your eye, while the elongated shape makes it perfect for feathering the shadow. It’s a must-have for creating smoky eyes. “Starting on the outer corner of the eye, use a windshield-wiper motion to apply the color in your eye’s natural crease,” suggests Lusine Galadjian, a Hollywood makeup artist who works with music stars like Demi Lovato, Miley Cyrus and Mariah Carey. Want to open up deep-set eyes? “Apply the color just above the crease,” she says.

Pencil Brush
This brush allows you to place shadow with pinpoint accuracy, and its dense fibers create smoky intensity. For a glam nighttime look, choose a shadow in a darker color than you’ve used on your lid or in the crease and apply it to the outer third of the eye, staying close to the lash line.

Angled Eyeliner Brush
Flat with an angled tip, this brush snuggles against the lash line to deliver a sharp strip of gel, cream or powder liner. “Start from the outer corner of your eye, which is where you want more of the color deposited, and work toward the inner corner,” suggests Galadjian.

Lip Brush
Sheer lipsticks and glosses can be applied right out of the tube, but bold colors with creamy or matte finishes call for more control. A small, stiff lip brush allows you to stay within the lines or extend your pout artfully.

Photo: Corbis Images

The Beauty Rules of Order

The sequence in which you apply serums, creams and cosmetics can be as important as the products themselves, so we asked a celebrity dermatologist and a makeup artist for their advice on what goes on when and why.

The Basics of Skin Care

Apply products with active ingredients that are designed to repair before you apply heavier products that protect. These “actives” include antioxidants, alpha hydroxy acids, peptides, vitamins and pigment lighteners. They contain molecules small enough to penetrate the outer layer of skin in order to get down to the deeper layers where they work to hydrate, brighten, smooth and firm the skin.

Heavier products, such as moisturizers and sunscreens, go on next because they function as shields, keeping UV rays out and moisture in, says Ava Shamban, M.D., who is the featured dermatologist on ABC’s “Extreme Makeover.” “If you make the mistake of topping a sunscreen with an antioxidant serum, the serum won’t be able to sink in since the cells are already sealed,” says Shamban. In other words, access denied, no matter how pricey or terrific the product may be.

The Basics of Cosmetics

Applying cosmetics in the right order results in a natural-looking finish and streamlines the process by preventing mistakes. “It has a lot to do with texture, such as not putting cream formulations on top of powdered ones,” says makeup artist Tonya Crooks, whose regular clients include Megan Fox and Fergie. Using a mineral powder foundation before cream blush will look blotchy because it will be hard to blend the blush. Lipstick should always go under lip gloss, so you can still achieve the shine you’re after.

Top Ten Beauty Rules of Order

Only a beauty-pageant contender would use all of the products that follow, but for purposes of illustration, here they are in their optimal order of application, after your morning cleansing routine.

1. If you use hydrating mists to plump up the skin, or gels for acne or rosacea, apply now. The mists soften the top layer of dead skin cells (the stratum corneum) and help conduct water-soluble products down to the deeper layers of skin.

2. Active ingredients in water-soluble gels and serums go on now. Examples are antioxidant serums, AHAs, peptides, vitamins C and E, ferulic acid, growth factors and pigment lighteners.

3. This is the time for moisturizer, which contains humectants to restore water to the skin and conditioners to soften it. Just as important, the moisturizer seals in the products that precede it.

4. Sun protection comes next. If your eyes are sensitive to the ingredients in regular sunscreen, use an eye cream with SPF that’s formulated to be nonirritating. On the rest of the face and neck, apply a broad-spectrum facial sunblock to fend off both UVA and UVB rays.

5. After allowing five to 10 minutes to let your sunscreen sink in, apply foundation. If you prefer the sheerness of a tinted moisturizing sunscreen, use that instead.

6. Whatever the foundation hasn’t covered gets painted over with concealer. A fine-tipped makeup brush works best to deliver concealer to blemishes, under-eye circles and red spots.

7. Translucent powder and powder blush go on next. (If you like a dewy look, skip the powder and apply cream blush instead.) Adding color to the cheeks at this step helps quell the urge to be heavy-handed on the eyes. “If you apply eye makeup to a pale face, it’s easy to overdo it,” says Crooks, “and then by the time you add blush, it all looks too theatrical.”

8. Eyebrow shadow or pencil, eye shadow and eyeliner are now up. Crooks prefers eyebrow shadows and pencils that are one shade lighter than your hair. If you use a pencil, it should be well-sharpened, hard and waxy to encourage the drawing of fine, hairlike strokes.

9. Mascara should be applied very carefully at this point to avoid smearing all of the good work that’s gone before it.

10. Lip treatments, lip liner, lipstick, and lip gloss are last, but not least. Chapped or dry lips should be prepped and plumped with a treatment cream or lotion. If you use lip liner, it goes on next, followed by lipstick, which can be topped off with lip gloss.

Summer Beauty Makeover

Summer beauty is getting a makeover this year. The look is a bit bolder and more daring than in seasons past. It doesn’t require a whole arsenal of new products or techniques. But it does take a willingness to depart from your tried-and-true hot-weather makeup and hair regimens. Try at least a couple of these new tweaks, courtesy of celebrity makeup artist Tasha Reiko Brown. You’ll be surprised how effortlessly modern they look and feel.

1. Skip the lip gloss. Instead, apply creamy color straight from the tube. Choose lipstick with a satin finish in bright sorbet colors like neon peach, raspberry, cotton-candy pink, lush melon. “Satin formulas pack a lot of pigment,” says Brown, “but they’re a lot friendlier than matte lipsticks.” Matte may be a favorite on the fashion runways, but because the formulation lacks shine, it can look severe and dry on small lips and too intense on full lips.

2. Put down the bronzer. A summer staple, bronzer is taking a vacation this year. In its place, a straight-from-the-orchard burst of fruity color. Swap winter’s rosy hues for peach, berry and tangerine. To make sure these shades look fresh rather than clownish, apply the color right on the apple of your cheeks. Choose a gel or cream blush instead of a powder, and look for a finish that doesn’t have any shimmer to it. “You want the wash of color to melt right into your skin without any contouring or hard lines so it looks soft and natural,” says Brown.

3. Quit the smoky eyes. If you’ve never quite mastered those multi-step smoky eye tutorials, here’s good news: It’s out of fashion this season, replaced by a foolproof wash of color from lash line to crease. Choose a melon, light gray, or citrusy lemon or lime hue. Apply with a fluffy eye shadow brush.

4. Lighten up on lashes. While there’s not an actual back-lash taking place, fringes are getting a little less showy this summer. “If you do a really heavy lash with the colorful wash of shadow, you’re going to end up with a look that’s ‘80s rather than current,” says Brown. “You want to keep your lashes clean and defined.” Just curl and apply two coats of your favorite mascara to your top lashes.

5. Embrace your hair’s natural texture. The flat iron is banned this summer, says Brown. Instead, the coolest look for those hot days is an off-the-face, pulled-back hairstyle that tames -- but doesn’t totally subdue -- your hair’s texture. Smooth your hair with a light styling cream that will hold it in place. Then, gather into a classic ballerina bun. Now, run your hands over your hair toward your face, freeing up the short pieces that don’t make it into the bun. Spritz with a shine spray for a polished finish. The end result: on-purpose texture instead of out-of-control frizz.

Photo: @iStockphoto.com/iconogenic

Pluck Your Brows Like a Pro

Arches done right can make eyes seem bigger and brighter, visually lift sagging lids, rev up hair color and give you an all-over gorgeous look. “Eyebrows are so important, they really help shape and define your face,” notes Hollywood brow expert Anastasia Soare, who does brow shape-ups for celebrities like Penelope Cruz, Jennifer Lopez and Jennifer Garner. Get pretty arches that are perfect for you with these tips.

Eyebrow Shaping Tools
What you’ll need: slant tip tweezers, a spiral brow brush (it looks like a clean mascara wand), and a stencil with brow powder and a brow brush.

Step-by-step Eyebrow Shaping
“The idea is to find balance between your brows and other features,” says Soare. “Take your time and step back from the mirror as you pluck every few hairs, to make sure you’re creating as much symmetry in your brows as possible.”

  1. Look into a regular mirror (a magnifying mirror will make it look like there’s more hair to remove than there really is) and gently brush brows up and outward with the spiral brush to get a sense of your natural brow shape.
  2. Brow stencils are a foolproof way to maintain your brows. Align the stencil over your brow (choose one that allows the most hair to come through). As you hold it there, use the brow brush to fill in your brow with brow powder. When you’re done, remove the stencil and tweeze the stray hairs beneath the powdered area for a clean, shaped line.
  3. While you can clean up the fuzz between your brows, don’t tweeze from the actual brow itself or you risk over-widening the space between the eyebrows. Leave tweezing above the brow to a pro. “It’s a tricky area and can lead to a flattened arch if not done perfectly,” says Soare. An expert knows how to brush the brows up and trim just the very tips of the tiny hairs, but it’s hard to do it yourself, and a mistake can lead to bald patches.
  4. Follow these steps every four weeks and try not to over-pluck -- brows with a more natural look are in.

Day-to-day Eyebrow Grooming
Blessed with full brows? Just use a little brow gel (waxy lip balm works in a pinch) to fix them in place and impart a healthy sheen. If your brows are sparse in spots, you may want to fill them in regularly with brow powder or pencil. Choose powder or pencil one shade lighter than your brows (unless they’re very pale) and use feathery strokes. Or consider a tinted brow gel as a one-step color-and-taming option.

Short brows can be extended carefully with a brow pencil. Draw a line that’s just long enough to accentuate the arch. Making the line too long can close in your eyes or make a heart-shaped face appear top-heavy, and a thin tail will leave your eyes looking droopy. Go half as far as you think you should and step back to survey; you’ll know when it looks right.

Gone Too Far?
If you’ve repeatedly tweezed too aggressively, the bad news is that some of the hairs may not grow back. “Plucking exerts a traction force on the hair follicle that can scar the follicle over time,” says Manhattan dermatologist Francesca Fusco. The good news is that some of those absent hairs may simply be in their rest cycle. Fusco adds that certain ingredients in brow serums, like peptides, can nudge skimpy arches back into the growth cycle. Look for a serum that also contains saw palmetto -- small studies have indicated it may inhibit an enzyme that contributes to hair loss. Paint the serum on brows twice a day and give it about two months to do its magic.

Your Beauty Toolbox

What woman doesn’t love trying out each season’s new makeup colors and formulas. And who can resist the latest shampoos, conditioners, pomades and gels that just might be the missing link to help you achieve the perfectly tousled locks of Blake Lively or the off-the-beach waves of Kate Hudson. Go ahead and indulge, but don’t overlook an essential element of your beauty artillery: brushes. The right brushes for both hair and makeup can help make you absolutely dazzling! 

Makeup
“If you don’t have the right application tools,” says Tasha Reiko Brown, Hollywood makeup artist and The Style Glossy blogger, “even the most expensive products won’t go on properly.” Look for brushes that feel comfortable in your hand, that aren’t shedding and that have soft bristles. Brown chooses synthetic bristles for concealer, lip and foundation brushes, but she opts for natural bristles -- such as sable, mink or goat -- for blush or powder brushes. “Stiffer bristles can scratch your skin,” she says. If you prefer not to use animal products, look for brushes made from high-grade synthetic fibers, such as the PETA-approved taklon bristles.

Here’s what you need:

  • Face Foundation brush, large powder brush, blush/bronzer brush (you can use one brush for both bronzer and blush, just wipe off brush between applying each product), concealer brush
  • Eyes Fluff brush for applying shadow to lid, flat liner brush for applying color along the lash line
  • Optional Tapered shadow brush for applying shadow in crease or blending eyeliner and shadow to create a smoky eye, spooly brush or disposable mascara wand for grooming brows and combing through eyelashes to remove clump between applying coats of mascara, angled eyebrow brush for applying powder to brows, and lip brush

Makeup artists are fastidious about keeping their tools pristine. “Perfect application comes from clean tools,” says beauty pro Robert Jones, author of Looking Younger: Makeovers That Make You Look as Young as You Feel. “Blush or powder brushes should be cleaned at least once a month, and eye brushes once a week.” Brown’s favorite brush cleaner? Your regular shampoo. “Just put a little shampoo on wet hands, run it through the brush hairs and lay the brush flat on a towel to dry.” Pros agree that with proper care, a set of brushes will last a decade or more.

Hair
Most women will need two combs, our experts say:

  • Wide-toothed comb should be kept in the shower for distributing conditioner evenly throughout hair and for gentle detangling.
  • Fine-toothed comb is necessary for backcombing or teasing. “At 4 in the afternoon when your hair is starting to flatten out, backcombing is an easy way to create volume,” says Kenneth Darrell, a Nashville hairdresser and educator. “Working from the crown, take panels of hair about 1/2 inch in thickness and gently tease. Then, smooth out just the surface of the hair. You won’t need any spray or styling product, because your hair will be sufficiently dirtied up from the day’s wear to hold the volume.”

A few different brush options are available, depending on your hair type and usage:

  • Round brush If you blow-dry your hair, this brush is essential. Look for one with a combination of synthetic and natural boar’s hair bristles: The nylon bristles will give you a good grip on your hair while the natural ones impart shine.
  • Paddle brush “Use a paddle brush at the end of the day to impart smoothness and shine to hair that may look a little flat and gnarly,” says Darrel.

Natural boar toothbrush This is optional.“Keep one in your purse,” suggests Michael Shaun Corby, a hair pro who oftenworks backstage at fashion shows. “If you add just a touch of pomade orhairspray to the bristles, you can tame all those flyaways on the surface ofyour hair without disrupting the style. If you have superfine or thin hair, usethe toothbrush right at your scalp in a circular motion to pick up all thosefine hairs that a hairbrush doesn’t get to. Every bit of volume helps!”

Photo by engin akyurt on Unsplash