No, But Really, You Should Wear Orange Lipstick

Did you know that orange is a universally flattering color? No really, I swear. First, consider your options: melon, coral, tangerine, terracotta, apricot, blood orange, burnt orange, neon and more. There are so many hues to go around, you’ll definitely be able to find one that’s right for you. Not to mention, orange is the hottest lip color for spring and summer (sorry, radiant orchid), so you might as well give the color a chance.

Orange lipstick may sound like another sensational trend (we’re looking at you, blue eye shadow) better suited for catwalk models than your average gal, but the color is much more wearable than it sounds. Don’t believe me? These made-in-heaven orange lipstick matches might just change your mind:

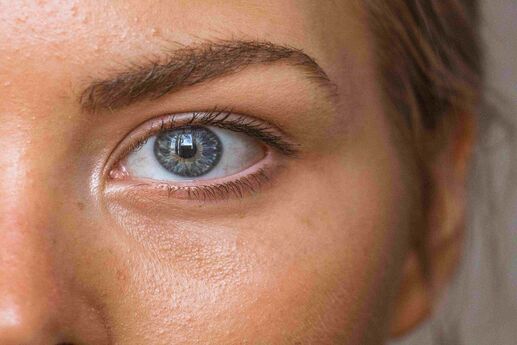
Blue Eyes: Orange makes blue pop like no other color. Going for a true orange (one that is equal parts red and blue) is a flawless match, but really any orange that complements your skin tone will work. For cooler undertones, try pastels, red-oranges and corals. Warmer undertones will look amazing in oranges with yellow, copper and golden hues.


Olive Skin: I’m pretty sure terracotta was invented for olive skin tones, but you can’t go wrong with a coral or any other orange that you’d pair with green (think cooler, blue-based oranges). This all also applies to Green/Hazel Eyes.


Yellow Undertones: Remember learning in elementary school that red plus yellow equals orange? If your skin has yellow undertones, you can rock the brighter and bolder oranges without overpowering your complexion.


Pale Skin: Orange can provide the same pop of color as a red lip, but it’s less harsh on pale skin than its ruby cousin.


Bronzed Skin: Bright oranges and bronzer were meant to be. They play on each other’s warmth in ways that even work for cooler skin tones.


Dark Skin: Lupita Nyong’o is the red carpet leader in all things orange lipstick. She has rocked blood orange, mandarin, sheer tangerine, coral and the list goes on. Fact: The darker your skin, the larger your selection of flattering bright and bold colors. Orange is no exception. For example, while sheer, lighter oranges tend to flatter all, rocking the bolder and deeper orange hues in sheer colors will be no challenge with darker skin.


Redheads: Pick an orange, any orange. You have the hair-given right to wear oranges like nobody else. Since your coloring is already working with the orange you’ve got, you can go for fun contrasting oranges or choose a similar shade for (get this) a more natural look.


So basically, if you’re a blue-eyed redhead with dark-as-night skin, you’ve won the orange lipstick lottery. But I’m not joking when I say anyone can pull off orange lips. However, going absolutely orange (such as neon or tangerine) may not be your style. No biggie. You can still rock spring and summer’s hottest lip trend by going for hues that aren’t all about the orange. Coral and blood orange shades, for example, can be found with a more balanced orange-to-pink or -red ratio respectively. And if you want to go orange but not scream it from the rooftops, try out a pastel or start with a gloss.

Still doubting the orange? So did I -- at first. My gateway orange was a red lipstick with a burnt-orange hue. Since then I’ve moved onto a medium coral and bright tangerine. So before you knock it, try it. And now is the time, as orange options are popping up in cosmetic aisles (and online stores) everywhere.


Makeup Tips for Winter’s Bold New Face

To look beautiful in the winter, you have to use a makeup strategy that’s different from the one you use in July. Sticking with summer’s bronzer just looks fake. Winter’s light is whiter and less yellow than summer light, so it’s apparent your color boost came from product rather than the sun. What’s more refreshing and modern is giving winter its own signature face.

This year, the frosty shades and tinsel-like shine of winters past are gone. Elegant matte texture has taken their place, and lips and cheeks are swept with bright pops of candy color. Yes, it’s a bold statement that can look Cirque du Soleil rather than chic if you get it wrong. Here’s how to get it right!

1. Add richer moisturizers to your skin care regimen. Those whipping winds outside and dry heating indoors can leave your skin parched and chapped. Matte foundation can catch on these dry patches, so you need to make sure your skin is plumped up and well-hydrated. Applying a thick moisturizer in the morning can add sheen to a matte face; instead, hydrate before bedtime with a luxurious extra-emollient night cream.

2. Go matte with minimal product. Yes, you need a new foundation for winter. Stick with the dewy base you used in summer and you’ll have to layer on lots of powder to dull the sheen. Instead, choose a matte textured foundation in your exact shade and apply sparingly. Set it with a light dusting of translucent powder applied with a large, loosely bristled powder brush.

3. Flatter your eyes with subtle makeup. Winter’s bold, bright look is focused on lips or cheeks. While you don’t want to overlook your eyes, you will want to enhance them with neutral makeup. First, give them a bit of a boost by applying a thin black line with a cream or liquid liner very close to the lash line. Define the crease of your lid with a neutral shade of brown or gray shadow. Apply with a crease brush in a half-moon shape. Curl your lashes, and then apply two coats of black mascara.

4. Choose between your cheeks or lips for the bold pop of color. If you have full lips with pout to spare, go for an assertive mouth. If your cheekbones are high, do an amazing blush flush. Pick only one area or you’ll look overdone. For your color choices, think flowers and fruit rather than jewels -- juicy red, rosy pink, ripe peach. Fair-skinned ladies look best in cooler pastel shades, while darker beauties should choose warm, blue-based shades.

5. If you’ve chosen your lips for that extra oomph, apply a matte lipstick straight from the tube. You’ll want to skip the liner so the look is soft. A nice bonus: Matte lipstick lasts longer than satin textures, so you won’t need to touch up for hours. Balance a bold mouth with a soft, natural blush along the cheekbone.

6. Playing up your cheeks? Moderation is key. Apply too much color and you’ll look like you have windburn. Apply too little and the effect doesn’t pack enough punch. Most cream formulas have a sheen finish, so choose a powder blush, which layers beautifully over matte skin. With an angled blush brush, apply the color right along your cheekbone. Building up color slowly as opposed to heaping it on will keep you from looking clownish. Finish with a slight touch of color to lips.

Embrace bright color this season and you’ll beat the winter blahs gorgeously!

Beauty Essential: Concealer

Concealer can be a girl’s best friend, especially after a night out sipping salt-rimmed margaritas. But even teetotalers can wake up with under-eye bags or dark circles -- resulting from lack of sleep, fluid retention, hay fever or just the deep-set eyes you inherited from Mom and Dad. Dermatologists say the thin tissue around the eye is subjected to more stress than are other areas of the skin, making it one of the earliest problem areas for women.

A good concealer can hide the problem, but there’s an art to finding the right shade and formula. For that, we asked Eugenia Weston, an Emmy-nominated celebrity makeup artist. She says there’s a reason most concealers are either peach (orange-based) or yellow: Each color does something different, which is why they’re often packaged side by side in a single compact. The trick isn’t deciding between peach and yellow (most of us need both), but choosing the depth of tone they’re available in -- light, medium or dark -- to match the pigment in your complexion.

Choosing the Right Color Concealer
If you have bluish or dark circles, a peach concealer will help cancel them out. But if your under-eye area and eyelids are pink-tinged, a common condition among the fair-skinned or allergy prone, a yellow concealer will counter the redness. The formula -- cream or liquid -- is a matter of personal preference. Cream concealers offer more coverage but take a little more skill to apply; liquids are sheer and a better bet for minimal circles or younger skin.

How to Apply
Using your ring finger for a light touch, prep the under-eye skin with eye cream so that the concealer won’t drag on. If you woke up with puffy peepers, apply a tightening or firming eye gel instead. The coolness and lifting ingredients should help send those bags packing.

If you wear foundation, bring it up under the eyes. Using an oval-shaped 1/3-inch wide synthetic bristled concealer brush, apply three dots of concealer starting at the tear ducts and ending at the iris. Paint them down and outward to cover the entire area. Gently blend in the concealer with your ring finger, using a press-and-roll motion. If upper eyelids are pink, stroke on yellow concealer there as a neutralizing eye shadow base.

Use a Powder
Set your concealer with one of the new ultrafine mineral powders in a colorless, one-size-fits-all translucent shade. “Dip the corner of a triangular latex sponge into the setting powder -- I use pressed rather than loose for neatness -- and blot it right up against the lash line,” says Weston. Powdering concealer is an often overlooked but essential step. “Otherwise, the mascara and eyeliner you’re about to apply will smudge as the day wears on, creating the very darkness you’re trying to eliminate.”

How Hair Can Help
It never hurts to think outside the box. If under-eye circles are chronic, a good hairstyle can deflect attention from them, says Tom Brophy of the Tom Brophy Salon. For instance, sideswept bangs cut from a side part will direct the beholder’s gaze away from the under-eye area, as will soft layers around the face. “What I would avoid,” says Brophy, “is a middle part or horizontal fringe, both of which would only frame the problem area.”

Also, consider that your natural hair color may be exaggerating those under-eye circles by casting a shadow on them. Colorist Michelle Vance at the Tom Brophy Salon has a solution: Lighten up. “Since dark shades and ashy tones can accentuate under-eye circles, think about taking your overall color one shade lighter. Or add a few blond highlights around the face to brighten things up,” she says.

Next thing you know, those sunglasses that were hiding your under-eye circles will have nothing to do but act as a headband up in your hair.

The Costume Hater’s Guide to Halloween

For the preteen set, Halloween is one of the most anticipated holidays of the year. But the event can strike terror into the hearts of those who are older and more restrained in tastes. Thankfully, with a little humor, some beauty tricks and a few inexpensive trinkets, getting into the spirit of Halloween can become more of a treat than a trick.

Glamour Makeup

If the thought of donning a costume sends you screaming for the hills, simply amp up your everyday makeup for a high-glam, slightly campy look. “Halloween is a time when women can channel their alter ego,” says Boston-based makeup artist Jody Cohen. If your usual look is nude lip gloss and a swipe of a neutral blush, just wearing a vivid Gwen Stefani-red lipstick and popsicle-pink cheeks will be enough to shock your friends and leave you feeling like you’ve donned an elaborate masquerade.

The finishing touch is false eyelashes. “Really long fake lashes in the corner of the eyes convey a sexy vampire look,” says Cohen. Don’t be intimidated by faux lashes, she adds. With a steady hand, the right amount of adhesive and a little practice, the new generation of fake lashes are easy to apply.

A Head-turning Hairstyle

A statement hairdo can take you almost all the way to a Halloween getup; all you’ll need to add are accessories. One easy look is red carpet ingenue, suggests hairstylist Philip Pelusi, who owns 17 salons in Pittsburgh and one in Manhattan. Set your hair in small or medium electric or Velcro rollers and spritz with a volumizing spray for extra volume. After 15 or 20 minutes, remove the rollers and toss the curls without brushing. Pair with something satiny or shimmery, throw on some fake costume bling and go.

Another inexpensive option: clip-on hair extensions from the local beauty supply store in whimsical colors like gold, yellow and pink. Clip them randomly around your head, slip into the wildest dress from your local thrift store and, voila, Lady Gaga. Or, channel Rihanna with a clip-on hair extension along your forehead to mimic her signature fringe. Apply pomade to the rest of your hair to slick it close to your forehead and gather any long tresses into a ponytail, then tuck them into a hideaway bun. Your outfit should be a pair of skinny jeans, high-heeled boots and faux diamonds from the costume store.

Shop Your Closet
Everything you need for a sexy and spirited Halloween is probably already in your closet. Los Angeles-based fashion stylist and vintage-store owner Brenna Egan says that with a little black dress or leggings and a black tee, you’re 90 percent there. “Grab some waterproof eyeliner and draw whiskers, cat eyes and a cute button nose to morph into a kitty cat,” she says. “Fishnets -- if you’re wearing a dress -- and platforms vamp it up.”

For an irreverent wink at Halloween, don gold leggings or tights -- you can find these at your local Target or American Apparel -- along with a gold tank and lots of faux gold bangles and necklaces. Carry a small garden shovel. What exactly are you dressed as? A gold digger, of course.

Photo: Corbis Images

Secrets to Flawless Foundation

Want gorgeous skin? Fake it! Sure, a proper skin care regimen, smart diet, regular exercise and never even looking at a lit cigarette (much less smoking one) will give you good skin. But to get to great, you need to bring in some artifice: foundation.

How to Choose the Best Foundation for You
The right foundation is what gives stars who walk the red carpet the look of poreless, airbrushed skin. And it can be yours too. First, choose the foundation that’s right for you in both texture and color. If your skin is oily, you’ll want to control your T-zone with an oil-free formula or a powder foundation. Mineral makeup is a good choice too. Those mineralized particles suck up extra moisture.

Opt for a cream or liquid foundation if you have dry skin. Look for words like “hydrating,” “moisturizing” or “luminous” in the product description. 

Hate makeup? Get the benefit of foundation without looking like you’re wearing any with a lightweight tinted moisturizer or a BB cream. These “beauty balms” are all-in-one wonders, acting as primer, coverage, moisturizer, skin treatment, sunscreen and even concealer. Find a shade that matches your skin exactly. When you swipe it across your jawline it should melt into your skin invisibly. Step into natural light to check it. (Yes, you want to go foundation shopping in the daytime.)

Application Secrets of the Pros
Borrow a few tricks from makeup artists for perfect application. Brett Freedman, a Hollywood makeup artist who has worked on stars like Emily Blunt, Catherine Zeta-Jones and Lisa Kudrow, says prepping your skin before your apply foundation is key. He likes to lay down a veil of lightweight oil-free foundation with a flat-top brush, allow it to dry for a few seconds and then use the same brush to apply foundation. “That way there’s still a touch of moisturizer on the bristles when I’m smoothing foundation over the skin,” Freedman says.

Makeup artists also spend at least a minute or more blending foundation so it completely melts into the skin. They make sure to blend around the hairline, ears and neck. Forget these areas and you can end up with the dreaded VFL (visible foundation line).

The pros are divided on whether to apply concealer before or after foundation. If you apply foundation first, some makeup artists say, you’ll know exactly where you need concealer. But Kimara Ahnert, who owns a makeup studio on Manhattan’s Madison Avenue and includes Brooke Shields and Cameron Diaz among her well-heeled clients, makes a convincing case for starting with concealer.

“Under-eye concealer first,” says Ahnert. “And foundation only on the rest of your face.” And here’s where her advice is truly eye-opening: “Do not double up!” she says. “If you layer foundation on top of the concealer, you’ll dilute it or completely blend away what you’ve just applied.”